
Plumbing problems strike every home eventually, creating stress and potentially expensive repair bills when you call professionals for every minor issue. The good news is that many common plumbing situations require no specialized training to address effectively. Learning DIY plumbing tips every homeowner should know empowers you to handle routine maintenance, fix minor problems, and understand when professional help truly becomes necessary. This knowledge saves substantial money over time while building your confidence in managing one of your home’s most critical systems. From unclogging drains to fixing leaky faucets, the fundamental skills covered here apply to homes across the USA, UK, and Canada, regardless of age or plumbing configuration.
Many homeowners feel intimidated by plumbing work, imagining that any involvement with pipes and water requires professional expertise. This mindset leads to expensive service calls for simple fixes that take minutes with the right knowledge and basic tools. While complex installations and major repairs certainly warrant professional plumbers, routine maintenance and minor repairs fall well within most homeowners’ capabilities. The DIY plumbing tips every homeowner should know focus on practical, safe techniques that require minimal investment in tools while delivering maximum value through reduced repair costs and improved home maintenance skills.
Before attempting any plumbing work, understanding how your home’s water system functions helps you diagnose problems and implement effective solutions. Every home contains two separate plumbing systems that work together to deliver fresh water and remove wastewater. The supply system brings pressurized fresh water from municipal lines or private wells into your home through a main supply line. This system branches throughout your house, delivering water to fixtures like sinks, toilets, showers, and appliances. The pressure pushing water through these pipes comes from the municipal water system or a well pump, allowing water to flow upward to second-floor bathrooms and reach all areas of your home.
The drainage system removes wastewater from your home through a network of sloped pipes that rely on gravity rather than pressure. Every drain connects to progressively larger pipes that eventually join your main sewer line leading to municipal sewers or a septic system. Drain pipes include vents that extend through your roof, allowing air into the system to prevent vacuum conditions that would slow drainage. Understanding this basic layout helps you locate shutoff valves, identify which fixtures share drain lines, and recognize how problems in one area might affect others.
Main shutoff valves control water flow to your entire home and represent the most critical component every homeowner must locate. This valve typically sits where the main water line enters your house, often in basements, crawl spaces, or utility areas. Turning this valve clockwise completely shuts off water to your home, essential during emergencies like burst pipes or major leaks. Individual fixtures also have shutoff valves controlling water to specific sinks, toilets, and appliances. Learning DIY plumbing tips every homeowner should know starts with locating these valves before emergencies occur, as finding them during a flooding crisis wastes precious time while water damage accumulates.
Water meters measure consumption for billing purposes but also provide valuable information about potential leaks. Most meters include a small dial or indicator that moves when any water flows through your system. Turning off all fixtures and appliances, then checking whether this indicator continues moving reveals leaks somewhere in your plumbing. This simple test helps detect hidden leaks behind walls or underground before they cause significant damage.
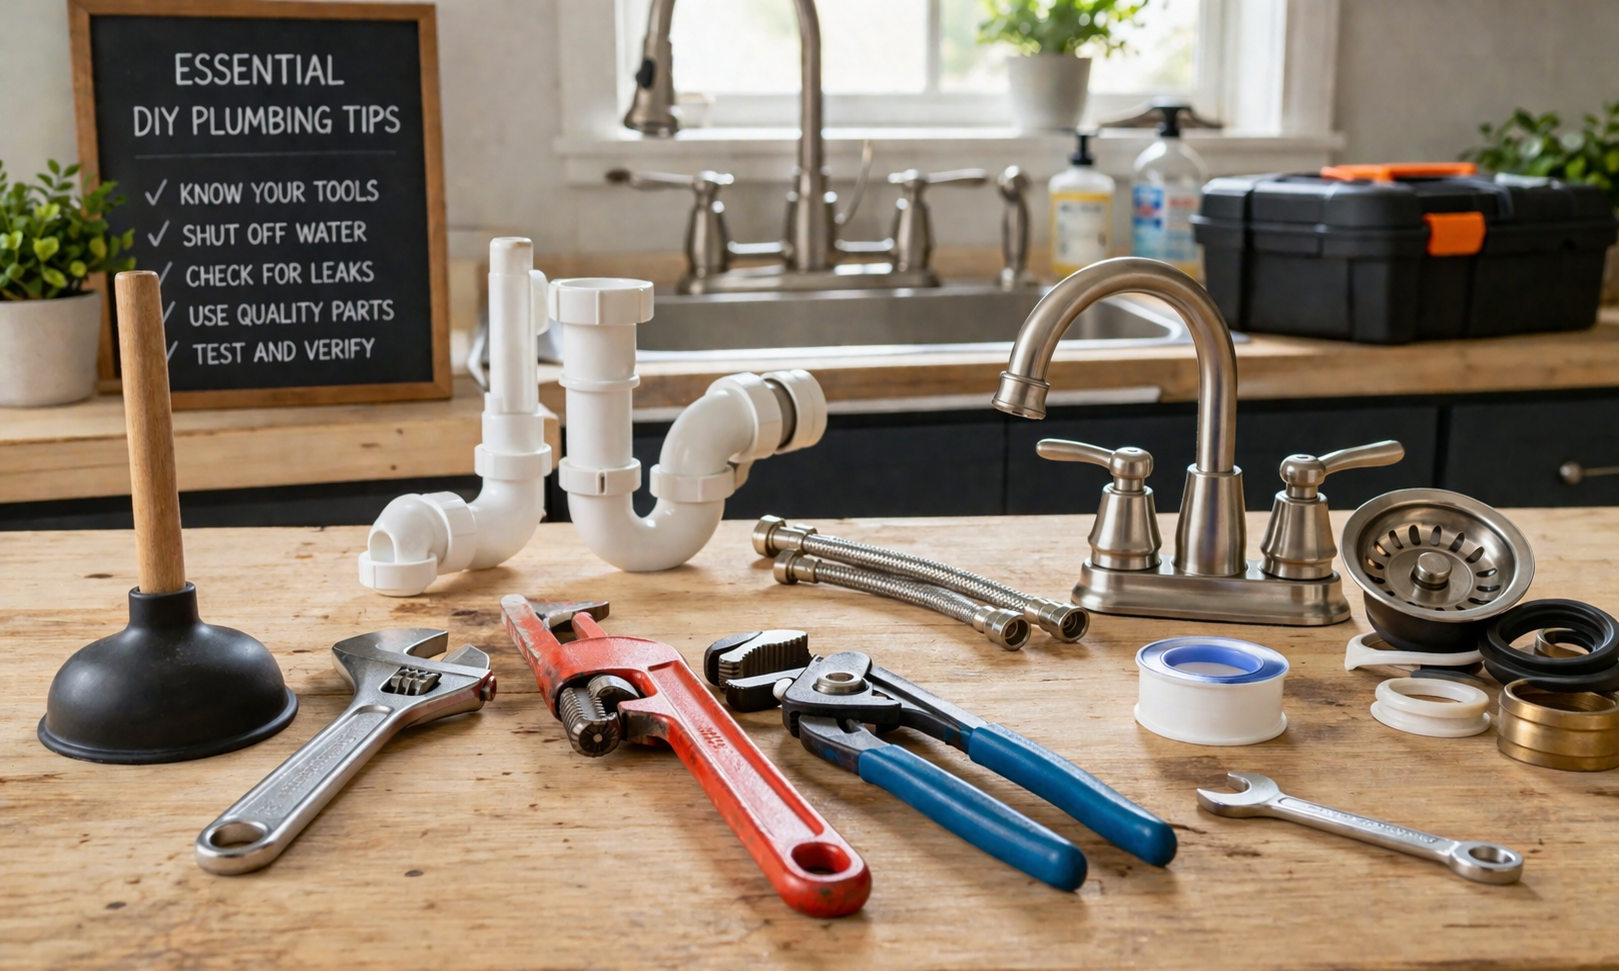
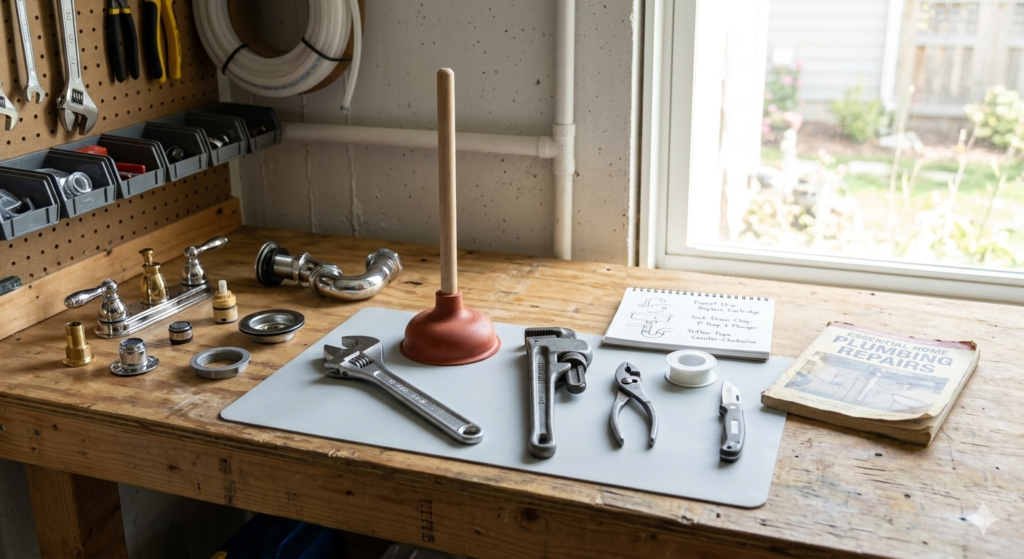
Effective DIY plumbing requires a modest collection of essential tools that handle most common repairs and maintenance tasks. You need not invest heavily in specialized equipment for basic work, but having the right tools makes jobs easier and prevents damage from improvising with incorrect implements. An adjustable wrench represents the most versatile plumbing tool, handling various nut and bolt sizes you encounter under sinks and behind toilets. Purchase one with an eight or ten-inch length that opens wide enough for larger drain nuts while still fitting into tight spaces.
Pipe wrenches provide the gripping power needed for threaded pipe connections that adjustable wrenches cannot handle effectively. The serrated jaws bite into pipe surfaces, allowing you to apply significant torque when loosening stubborn connections. A single fourteen-inch pipe wrench handles most residential needs, though serious DIY enthusiasts eventually add a smaller eight-inch model for tight spaces. Remember that pipe wrenches leave marks on visible chrome fixtures, so use adjustable wrenches or specialized strap wrenches on finished surfaces you want to protect.
Plungers come in two distinct types serving different purposes. Cup plungers with flat bottoms work for sinks, tubs, and flat drains, while flange plungers have an extended rubber sleeve designed specifically for toilet drains. Having both types ensures you can properly address clogs in any fixture. A quality plunger creates better seals and lasts longer than cheap versions that tear or lose their shape quickly.
Drain snakes or augers clear clogs beyond the reach of plungers by physically breaking through or retrieving blockages. Hand-crank models extend fifteen to twenty-five feet into drains, handling most household clogs without requiring expensive power augers. These tools save countless service calls for stubborn clogs that plungers cannot clear. Plumber’s tape, also called Teflon tape, seals threaded pipe connections to prevent leaks. This inexpensive item belongs in every toolkit, as you will use it repeatedly when reassembling any threaded plumbing connection.
Additional useful items include a basin wrench for reaching nuts in cramped spaces behind sinks, a hacksaw for cutting pipes when necessary, and various replacement washers and O-rings that commonly wear out. Building this toolkit gradually as you tackle different projects makes more sense than purchasing everything at once. Many repairs require only one or two tools, allowing you to invest incrementally while learning DIY plumbing tips every homeowner should know through hands-on experience.
Leaky faucets rank among the most common and annoying plumbing problems homeowners face. That constant dripping wastes surprising amounts of water over time while creating irritating noise and potential staining in sinks. Fortunately, most faucet leaks result from worn washers, O-rings, or cartridges that you can replace easily with basic tools and minimal expense. Understanding your faucet type determines the repair approach, as different designs use different internal mechanisms.
Compression faucets represent the oldest and simplest design, using rubber washers that compress against valve seats to stop water flow when you turn the handles. These faucets have separate hot and cold handles that rotate multiple turns to open and close. Leaks typically occur when washers wear out, requiring replacement to restore proper sealing. Turn off water supply to the faucet using the shutoff valves under the sink, then open the faucet to drain remaining water. Remove the decorative cap on the handle, unscrew the handle screw, and pull off the handle to expose the packing nut. Use an adjustable wrench to remove this nut, then pull out the valve stem. The rubber washer sits at the bottom of the stem, held by a small brass screw. Replace the worn washer with an identical size, reassemble the faucet, and turn the water back on.
Cartridge, ball, and ceramic disc faucets use different mechanisms but all feature single handles controlling both temperature and flow. These modern designs prove more durable than compression faucets but eventually require cartridge or seal replacement. Repair kits specific to your faucet model contain the necessary parts along with instructions. The general process involves removing the handle and decorative escutcheon to access the cartridge or internal assembly, then replacing worn components according to the manufacturer’s directions.
Before starting any faucet repair, take photos of the assembly process with your phone as you disassemble components. These reference images prove invaluable during reassembly when you cannot remember the exact order or orientation of parts. Keep track of small screws and parts using a magnetic parts tray or small bowls to prevent losses. Patience matters more than speed when learning DIY plumbing tips every homeowner should know, as rushing leads to mistakes and frustration.
If your faucet continues leaking after replacing washers or cartridges, the valve seat may be corroded or damaged. This metal surface against which the washer seals can develop rough spots that prevent proper sealing. Valve seat dressers or reamers smooth these surfaces, though badly damaged seats might require professional replacement. When repair attempts fail or you encounter unexpected complications, recognizing the need for professional help prevents causing more expensive damage through continued amateur efforts.
Slow or clogged drains frustrate homeowners regularly, tempting many to reach for chemical drain cleaners promising quick solutions. These harsh products often create more problems than they solve, damaging pipes and creating dangerous fumes while providing only temporary relief. Learning effective mechanical methods for clearing clogs represents one of the most valuable DIY plumbing tips every homeowner should know, as these techniques work better and safer than chemical solutions.
Plungers provide the first line of defense against most clogs using water pressure and suction to dislodge blockages. For sink clogs, first remove the pop-up drain stopper or strainer, then fill the sink with several inches of water to create the seal needed for effective plunging. Block the overflow hole with a wet cloth to prevent air escape that reduces plunging effectiveness. Place your cup plunger firmly over the drain opening and push down slowly to expel air, then pull up sharply to create suction. Repeat this vigorous plunging motion twenty to thirty times while maintaining the seal. The alternating pressure and suction often dislodges clogs, allowing them to wash down the drain.
When plungers fail, drain snakes reach deeper into pipes to physically break through or retrieve clogs. Insert the snake end into the drain opening and feed it into the pipe while rotating the handle clockwise. When you encounter resistance from the clog, continue rotating while applying gentle forward pressure. The snake either breaks through the blockage or catches onto it, allowing you to pull the material out. This mechanical approach removes hair, soap buildup, and other common clog materials that chemicals cannot dissolve effectively.
Prevention proves easier than clearing stubborn clogs, making regular maintenance important. Pour boiling water down drains weekly to melt soap and grease before they accumulate into blockages. Use drain strainers in all sinks and tubs to catch hair and debris before they enter pipes. Never pour cooking grease down drains, as it solidifies in pipes creating stubborn clogs. Running hot water for thirty seconds after each sink use helps flush away materials before they settle.
For particularly stubborn clogs that resist both plunging and snaking, the P-trap under the sink might contain the blockage. This curved pipe section traps debris and creates a water seal preventing sewer gases from entering your home. Place a bucket under the P-trap to catch water, then use slip-joint pliers or a pipe wrench to loosen the slip nuts connecting the trap to the drain pipe and tailpiece. Remove the trap, clean out any accumulated debris, and reassemble. This direct access often clears clogs that other methods cannot reach.
Running toilets waste enormous amounts of water, potentially hundreds of gallons daily, while creating constant noise that disturbs your home’s peace. These problems usually stem from simple component failures inside the toilet tank that you can diagnose and repair easily. Understanding DIY plumbing tips every homeowner should know for toilets starts with recognizing the basic components and their functions. The flapper valve seals the tank bottom, holding water until you flush. The fill valve refills the tank after flushing, controlled by a float that shuts off water when the proper level is reached. The flush valve assembly allows water to rush from the tank into the bowl during flushing.
When toilets run continuously, the flapper typically fails to seal properly, allowing water to leak from the tank into the bowl. Remove the tank lid and observe the flapper during a flush cycle. If water continues flowing into the bowl after the tank refills, the flapper needs replacement. Turn off the water supply valve at the toilet base, flush to empty the tank, then disconnect the old flapper from the flush valve. Flappers attach with small ears that hook onto the valve or via a ring that slides over the overflow tube. Purchase a universal flapper from any hardware store and install it according to package directions. These inexpensive parts typically cost a few dollars and install in minutes, stopping water waste immediately.
Sometimes toilets run intermittently as the tank slowly loses water and the fill valve periodically activates to refill it. This phantom flushing indicates a slow leak past the flapper or a crack in the flush valve. Food coloring in the tank water helps identify leaks by tinting bowl water if the flapper leaks. Replace the flapper if coloring appears in the bowl without flushing. Mineral deposits on the flapper or valve seat sometimes prevent proper sealing even when the flapper remains in good condition. Gently clean these surfaces with fine sandpaper or an old toothbrush to restore the seal.
Fill valve problems cause tanks to overfill, sending water down the overflow tube into the bowl. Adjusting the float lowers the water level, though badly worn fill valves require replacement. Modern fill valves install without tools in about fifteen minutes, featuring adjustment mechanisms that set proper water levels easily. Turn off the water supply, flush and sponge out remaining tank water, then disconnect the supply line and remove the locknut holding the old fill valve. Install the new valve according to instructions, reconnect the supply line, and adjust the float to set the water level about an inch below the overflow tube top.
Weak flushes that fail to clear the bowl completely frustrate users and may indicate partial clogs in the toilet’s internal passages. Mineral deposits accumulate in the rim holes around the bowl underside, reducing water flow during flushing. Use a small mirror to inspect these holes, then clean them with a piece of wire or a small Allen wrench. This simple maintenance often restores full flushing power to toilets that have gradually weakened over time. Understanding these repairs represents essential DIY plumbing tips every homeowner should know, as toilet problems affect every household eventually.
Low water pressure transforms simple tasks like showering or filling pots into frustrating, time-consuming ordeals. While some pressure problems require professional diagnosis of supply issues or corroded pipes, many result from simple causes you can address yourself. Identifying whether low pressure affects your entire house or specific fixtures determines the appropriate troubleshooting approach and helps you understand what repairs you can handle independently.
If low pressure affects only one fixture, the problem typically lies in the faucet aerator or showerhead. These components include screens that filter debris from water but gradually accumulate mineral deposits that restrict flow. Unscrew the aerator from the faucet spout using your fingers or carefully with pliers if it is stuck tight. Disassemble the aerator, noting the order of components for reassembly. Soak the screens and parts in white vinegar overnight to dissolve mineral buildup, then rinse thoroughly and reassemble. This simple cleaning often restores full pressure to affected fixtures.
Showerheads develop similar mineral accumulation that reduces spray force. Remove the showerhead by turning counterclockwise with a pipe wrench, protecting the finish with a cloth. Soak it in vinegar solution overnight, then use an old toothbrush to scrub away remaining deposits. For stubborn buildup, use a small wire or toothpick to clear individual spray holes. This maintenance should become part of regular home care in areas with hard water that deposits minerals rapidly.
Partially closed shutoff valves create pressure restrictions that homeowners sometimes overlook. After repairs or maintenance, someone might not fully reopen the shutoff valve serving a particular fixture. Check valves under sinks and behind toilets to ensure they are completely open, turning them counterclockwise until they stop. The main shutoff valve should also be fully open, as partially closed positions restrict pressure throughout your home.
Pressure regulators control the water pressure entering your home from municipal supplies, protecting plumbing from excessive pressure. These devices occasionally fail or require adjustment, causing low pressure throughout your house. Pressure regulators typically install on the main supply line where it enters your home. Some models include adjustment screws that let you increase pressure within safe limits. However, regulator replacement often requires professional help due to its critical role in protecting your plumbing system from damage.
When learning DIY plumbing tips every homeowner should know regarding pressure problems, recognize that corroded pipes or main supply issues exceed DIY capabilities. If cleaning aerators and checking valves fail to restore pressure, particularly when the problem affects multiple fixtures, professional diagnosis becomes necessary. Widespread low pressure might indicate serious issues requiring pipe replacement or coordination with your water utility.
Frozen pipes create serious emergencies that can burst and flood your home with hundreds of gallons of water, causing thousands of dollars in damage. While prevention represents the best approach, knowing how to respond when pipes freeze minimizes damage and sometimes allows you to resolve situations without professional help. These skills represent critical DIY plumbing tips every homeowner should know, especially in cold climates across the USA, UK, and Canada where freezing temperatures threaten plumbing systems.
Prevention starts with insulating pipes in unheated areas like basements, crawl spaces, attics, and exterior walls. Foam pipe insulation costs little and installs easily by slipping over pipes and sealing with tape. Focus on pipes in vulnerable locations first, as comprehensive insulation of all plumbing would prove unnecessarily expensive. During extreme cold, allowing faucets to drip slightly keeps water moving through pipes, preventing freezing. Opening cabinet doors under sinks on exterior walls allows heated room air to warm pipes.
If you turn on a faucet and only a trickle emerges during freezing weather, the pipe has likely frozen. Leave the faucet open, as this allows water to flow once thawing occurs and helps relieve pressure from expanding ice. Locate the frozen section by checking accessible pipes in unheated areas for frost or extremely cold surfaces. Apply gentle heat using a hair dryer, space heater, or hot towels wrapped around the pipe. Never use open flames, propane torches, or other high-heat sources that can damage pipes or start fires.
Start thawing from the faucet end and work toward the frozen section, allowing melting ice to escape rather than building pressure. Patience matters during thawing, as rushing with excessive heat causes more problems. If you cannot access the frozen pipe or feel uncomfortable attempting to thaw it yourself, call a plumber immediately. Professional thawing equipment safely restores flow without the damage risk associated with improvised heating methods.
When pipes burst before you can thaw them, immediately shut off the main water supply to stop flooding, then open faucets to drain remaining water from pipes. Move belongings away from the leak and use towels or buckets to minimize water damage while waiting for professional repairs. Understanding these emergency responses represents essential knowledge that protects your home during plumbing crises.
Learning DIY plumbing tips every homeowner should know includes recognizing situations requiring professional expertise. Attempting repairs beyond your skill level wastes time and money while potentially causing damage that makes professional repairs more expensive. Some clear indicators suggest you should call a licensed plumber rather than proceeding with DIY approaches.
Any work involving moving or installing new plumbing lines, whether supply or drain pipes, typically requires professional help. These projects demand knowledge of building codes, proper materials, and installation techniques that ensure code compliance and prevent future problems. Permit requirements in most jurisdictions make DIY installation impractical even if you possess the skills. Gas line work always requires licensed professionals due to safety concerns and legal requirements.
Water heater installation and major repairs exceed most homeowners’ capabilities due to safety issues involving electricity or gas combined with plumbing connections. While you might drain a water heater or replace a heating element, complete installations require professional expertise. Sewer line problems including tree root intrusion, main line clogs, or pipe collapse necessitate professional equipment and expertise beyond DIY scope.
Persistent problems that resist your repair attempts suggest underlying issues requiring professional diagnosis. If you replace faucet parts but leaks continue, install new toilet components but running persists, or clear drains that immediately reclog, professional assessment identifies problems you might miss. Honest recognition of when situations exceed your abilities prevents frustration and additional damage from continued amateur efforts.
Major remodeling projects involving bathroom or kitchen relocations require professional plumbers familiar with code requirements and complex installations. While you might handle finish work like installing faucets or connecting supply lines, the rough plumbing creating new drain and supply routes demands professional expertise. Building inspector approval often requires licensed plumber certification of work quality.
Choosing reputable plumbers when professional help becomes necessary protects you from poor workmanship and excessive charges. Verify licensing and insurance before hiring anyone to work in your home. Request detailed estimates explaining work to be performed and materials costs. Check online reviews and ask friends for recommendations. Quality professional plumbers value customers who understand basic plumbing and attempt appropriate DIY repairs, as this demonstrates home care commitment and realistic expectations about what constitutes professional-grade work.
Regular maintenance prevents many common plumbing problems while extending system lifespan and avoiding expensive emergency repairs. Incorporating simple maintenance tasks into your home care routine represents some of the most valuable DIY plumbing tips every homeowner should know. These preventive measures require minimal time and expense while delivering substantial long-term benefits through improved reliability and reduced repair costs.
Annual water heater maintenance flushes sediment that accumulates in tanks, reducing efficiency and eventually causing failures. Connect a garden hose to the drain valve at the tank bottom, run it to a floor drain or outdoors, then open the valve to drain several gallons of water carrying sediment with it. This simple task improves heating efficiency and extends tank life significantly. Check the temperature pressure relief valve annually by lifting its test lever to ensure it operates freely. This safety device prevents dangerous pressure buildup that could cause tank explosions.
Inspect exposed pipes periodically for signs of corrosion, leaks, or damage. Small leaks that you catch early prevent the extensive damage that develops when leaks go unnoticed for weeks or months. Look for water stains on ceilings and walls indicating hidden leaks requiring investigation. Address minor corrosion with pipe repair products or replacement before it progresses to failures.
Test sump pumps before heavy rain seasons to ensure they operate properly when needed. Pour water into the sump pit until the float activates the pump, then verify water pumps out correctly. Clean the intake screen and ensure the discharge line directs water away from your foundation. Sump pump failures during storms cause basement flooding that exceeds most plumbing repair costs many times over.
Septic system maintenance includes regular pumping every three to five years depending on household size and tank capacity. Avoid flushing inappropriate materials like feminine hygiene products, wipes (even those labeled flushable), or excessive paper that accelerates tank filling. Use septic-safe toilet paper and cleaning products that do not kill beneficial bacteria processing waste.
Clean pop-up drain stoppers in bathroom sinks monthly to remove accumulated hair and soap scum. These assemblies lift out easily, allowing you to wipe away buildup that would otherwise contribute to slow drains or clogs. Similarly, clean shower drain covers and remove visible hair regularly rather than allowing it to create blockages deeper in pipes.
You can safely handle most faucet repairs, toilet component replacements, drain unclogging, aerator cleaning, and supply line replacements under sinks. These repairs involve shutting off local water supplies, working with accessible components, and using basic hand tools. Always research specific procedures before starting and shut off water supplies before beginning work to prevent flooding.
Call a plumber immediately if you cannot locate the leak source, cannot stop the leak by shutting off fixture valves, if water is spraying or flowing rapidly, or if the leak affects electrical outlets or appliances. Any leak you cannot stop with shutoff valves requires professional help, as does flooding that threatens structural damage or personal property.
Gurgling drains usually indicate venting problems that prevent air from entering the drain system, creating partial vacuum conditions. This can result from blocked vent pipes on your roof or improper venting during installation. While not immediately damaging, gurgling suggests drainage system issues that eventually cause slow drains or complete blockages. Have a plumber inspect venting if gurgling persists.
Avoid chemical drain cleaners when possible, as they damage pipes over time, create dangerous fumes, and provide only temporary relief. These harsh products work by generating heat that can melt plastic pipes or crack porcelain fixtures. Mechanical methods using plungers and snakes work better and safer for most clogs without the environmental and health hazards chemicals create.
Replace wax rings only when removing toilets for other repairs or when you notice water leaking from the toilet base during flushing. These seals typically last decades when left undisturbed. If you must remove a toilet, always install a new wax ring during reinstallation, as old rings do not reseal properly after compression.
Mastering DIY plumbing tips every homeowner should know transforms you from dependent on expensive professional service for every minor issue into a confident problem-solver capable of handling routine maintenance and common repairs. The skills covered here, from fixing leaky faucets to unclogging drains and maintaining your water heater, represent the foundation of home plumbing competence that saves substantial money over years of homeownership. These abilities also provide faster responses to problems, as you can address issues immediately rather than waiting for plumber availability during emergencies. Beyond practical benefits, the confidence gained from successfully repairing your own plumbing creates satisfaction and encourages tackling additional home improvement projects. Remember that learning plumbing skills represents a gradual process built through hands-on experience with increasingly complex repairs, starting with simple tasks like replacing faucet washers before progressing to more involved projects. Maintaining a properly stocked toolkit with essential implements ensures you possess the tools needed when problems arise, preventing frustration from attempting repairs with inadequate equipment. Equally important is recognizing the boundaries of DIY capabilities and calling professional plumbers for complex installations, code-required work, or situations exceeding your skill level. This balanced approach optimizes cost savings from DIY repairs while ensuring critical work receives expert attention. Preventive maintenance represents perhaps the most valuable plumbing knowledge, as regular inspections and simple upkeep prevent many problems from developing into expensive emergencies requiring professional intervention. Homeowners across the USA, UK, and Canada who invest time learning basic plumbing skills discover that their homes’ most essential systems become less mysterious and more manageable, building the self-sufficiency that defines successful homeownership. Start your plumbing education with simple projects, build skills gradually through practice, and maintain realistic expectations about what you can accomplish independently versus what requires professional expertise, and you will develop the practical competence that makes homeownership more affordable and less stressful for decades to come.